Table Of Contents
ToggleA Story
In the vibrant city of Hyderabad, the rhythm of life often revolves around trust and authentication. The story we’re about to explore begins with a young entrepreneur named Priya, who finds herself facing a unique verification challenge. She needed to confirm a critical piece of information — the email ID linked to her newly hired personal assistant’s Aadhaar Card.
Priya had recently brought on board a dedicated assistant named Aryan, highly recommended for his organizational skills. Aryan had promptly submitted his Aadhaar Card for identification purposes, but it lacked the essential detail — his linked email ID. This gap left Priya in a dilemma. She recognized the significance of this verification, particularly when it came to ensuring the smooth operation of her burgeoning business.
Priya decided to initiate a candid conversation with Aryan about the matter. She kindly asked for the email ID associated with his Aadhaar Card, explaining that it was not only a matter of trust but also a critical component of their work coordination. Aryan, sympathetic to her concern, promptly shared the email ID linked to his Aadhaar.
Priya felt a surge of relief. She understood that, in this digital age, verifying such details was not just a matter of compliance; it was about safeguarding her business operations and, ultimately, her peace of mind.
Have you ever encountered situations akin to Priya’s in your daily life?
Do you comprehend how these verification processes have seamlessly woven themselves into our everyday routines? Whether you’re onboarding household help, establishing new social connections, or engaging in employment opportunities, these verifications stand as pillars of trust and safety, anchoring our interactions.
If you resonate with these scenarios, we invite you to explore our blog post further. Inside, we’ll walk you through a user-friendly process for verifying Aadhaar-registered email IDs associated with any Aadhaar Card using UIDAI’s services.
In today’s interconnected world, where trust occasionally feels fragile, possessing the ability to verify Aadhaar-registered email IDs can provide a profound sense of security and confidence. In this modern era, where every interaction and connection holds immense significance, the power of verification should never be underestimated.
Verify Aadhaar Registered Email ID : A Step-By-Step Guide
Discover a comprehensive guide for verifying an Aadhaar-registered email ID. Input both the Aadhaar Number and email ID to confirm their connection.
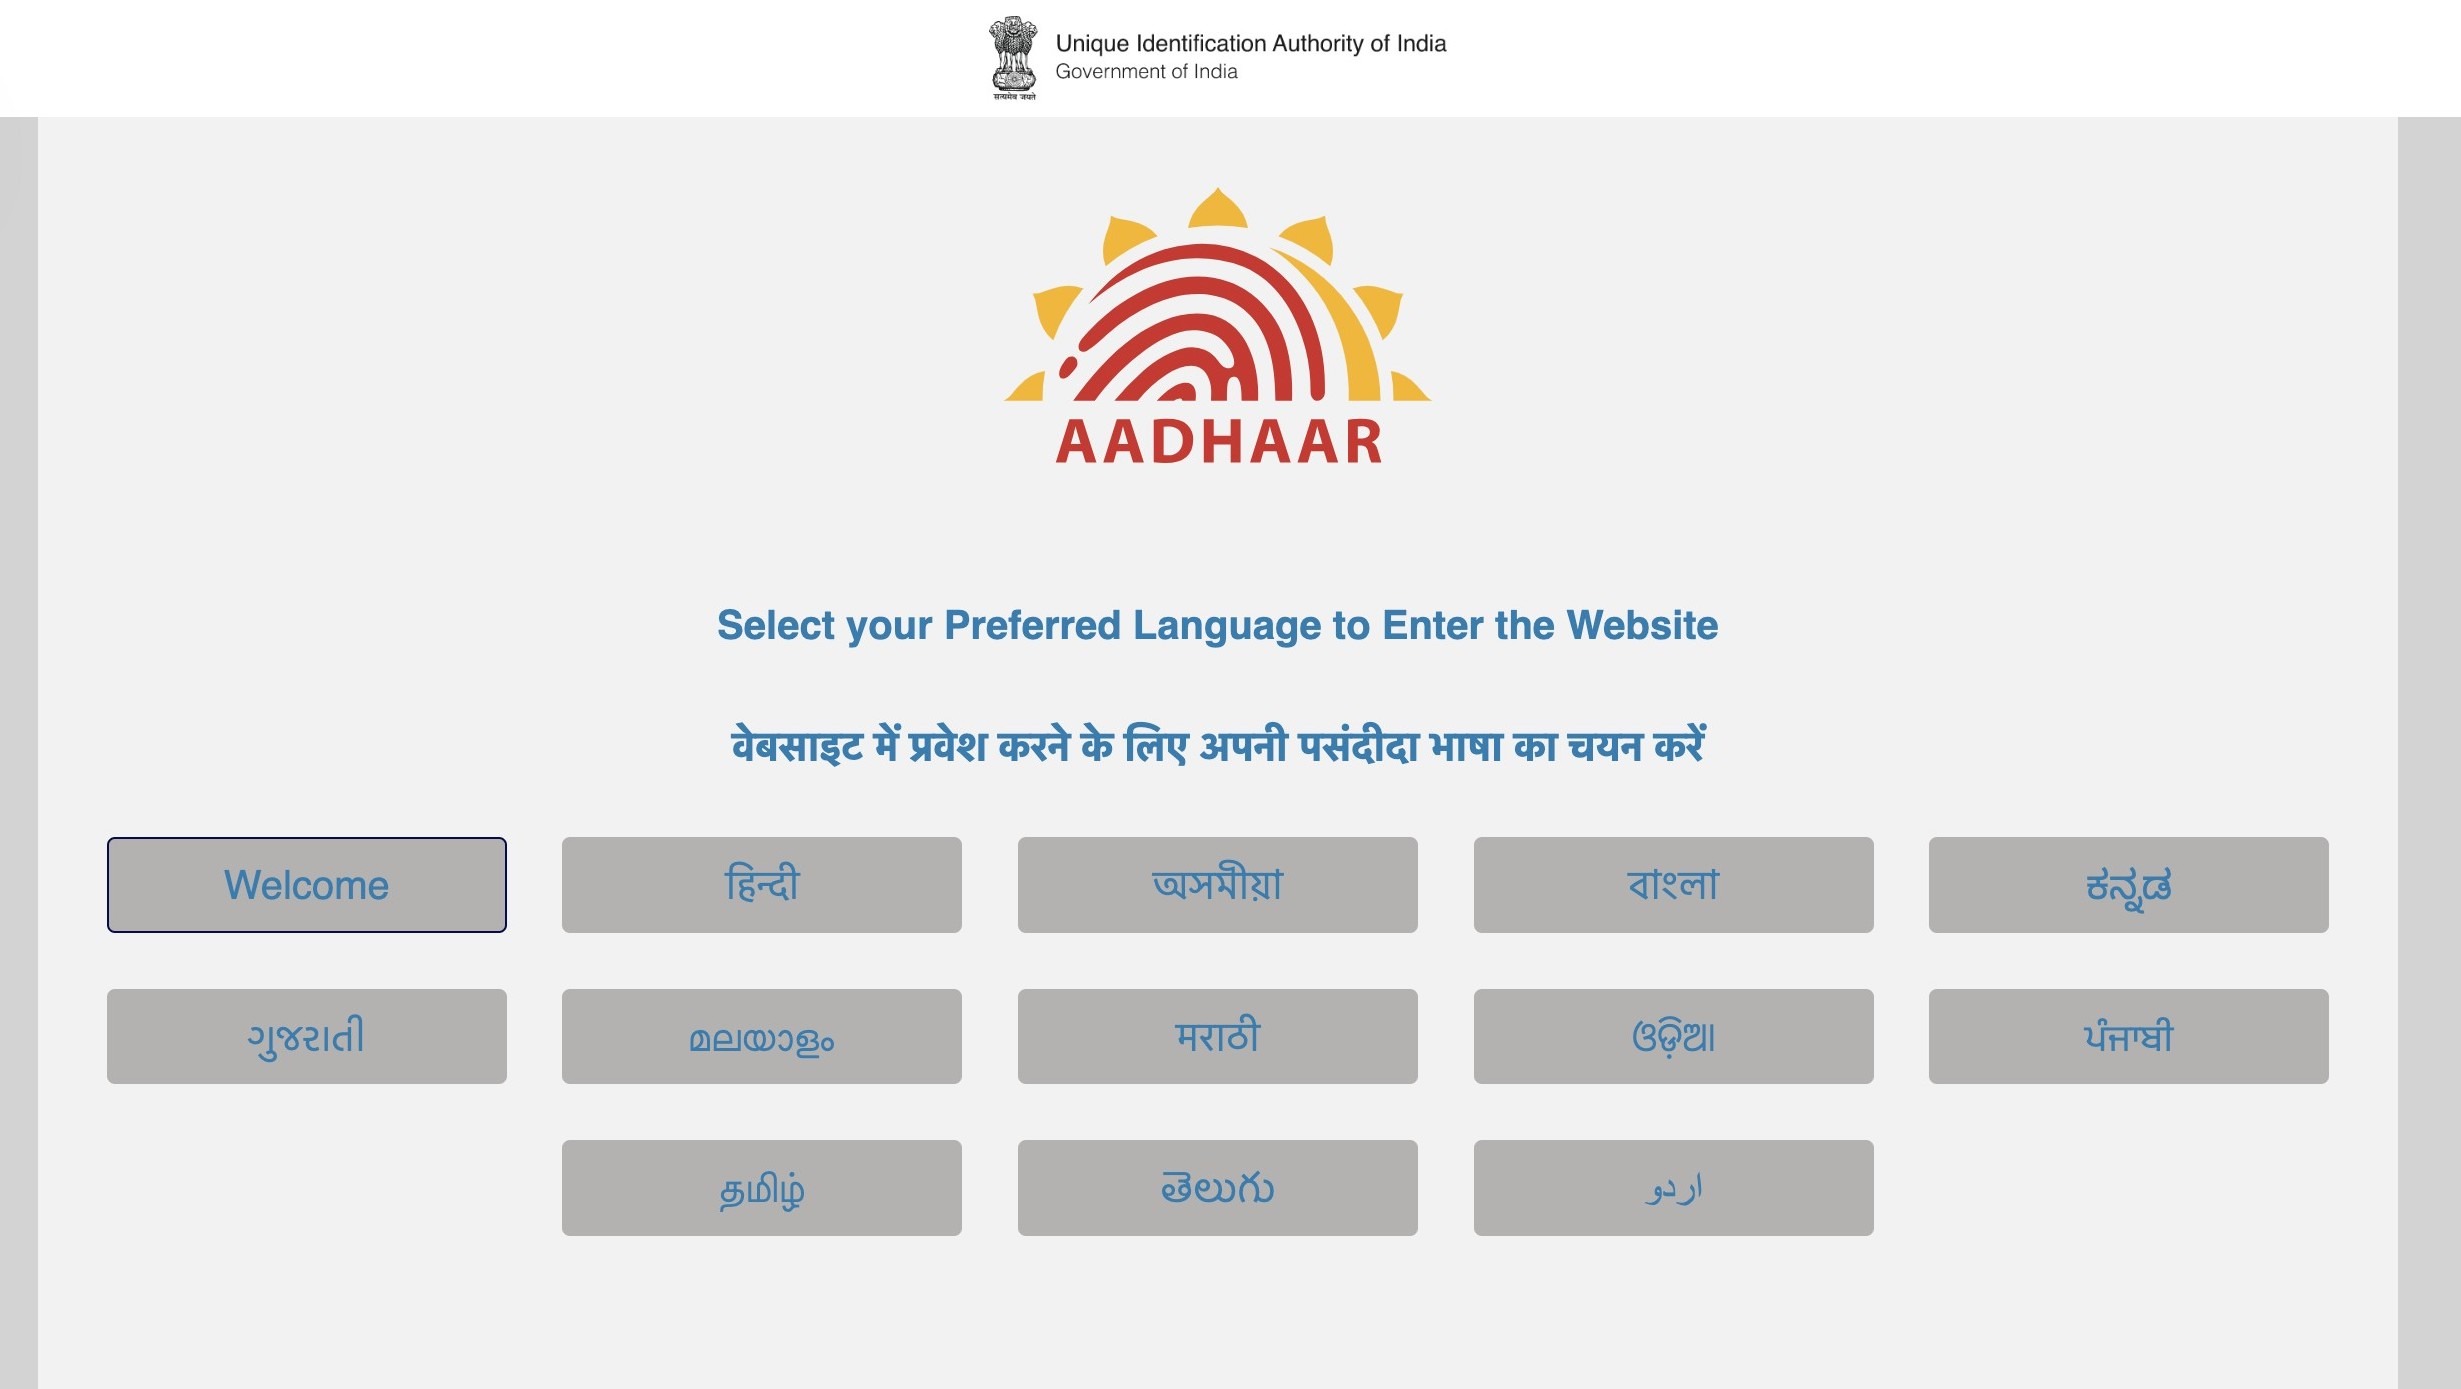
Step 1 - Visit the official UIDAI website
Step 2 - You have the option to choose from 13 different languages for accessing the website. In this instance, I am selecting "English" and then clicking on it.
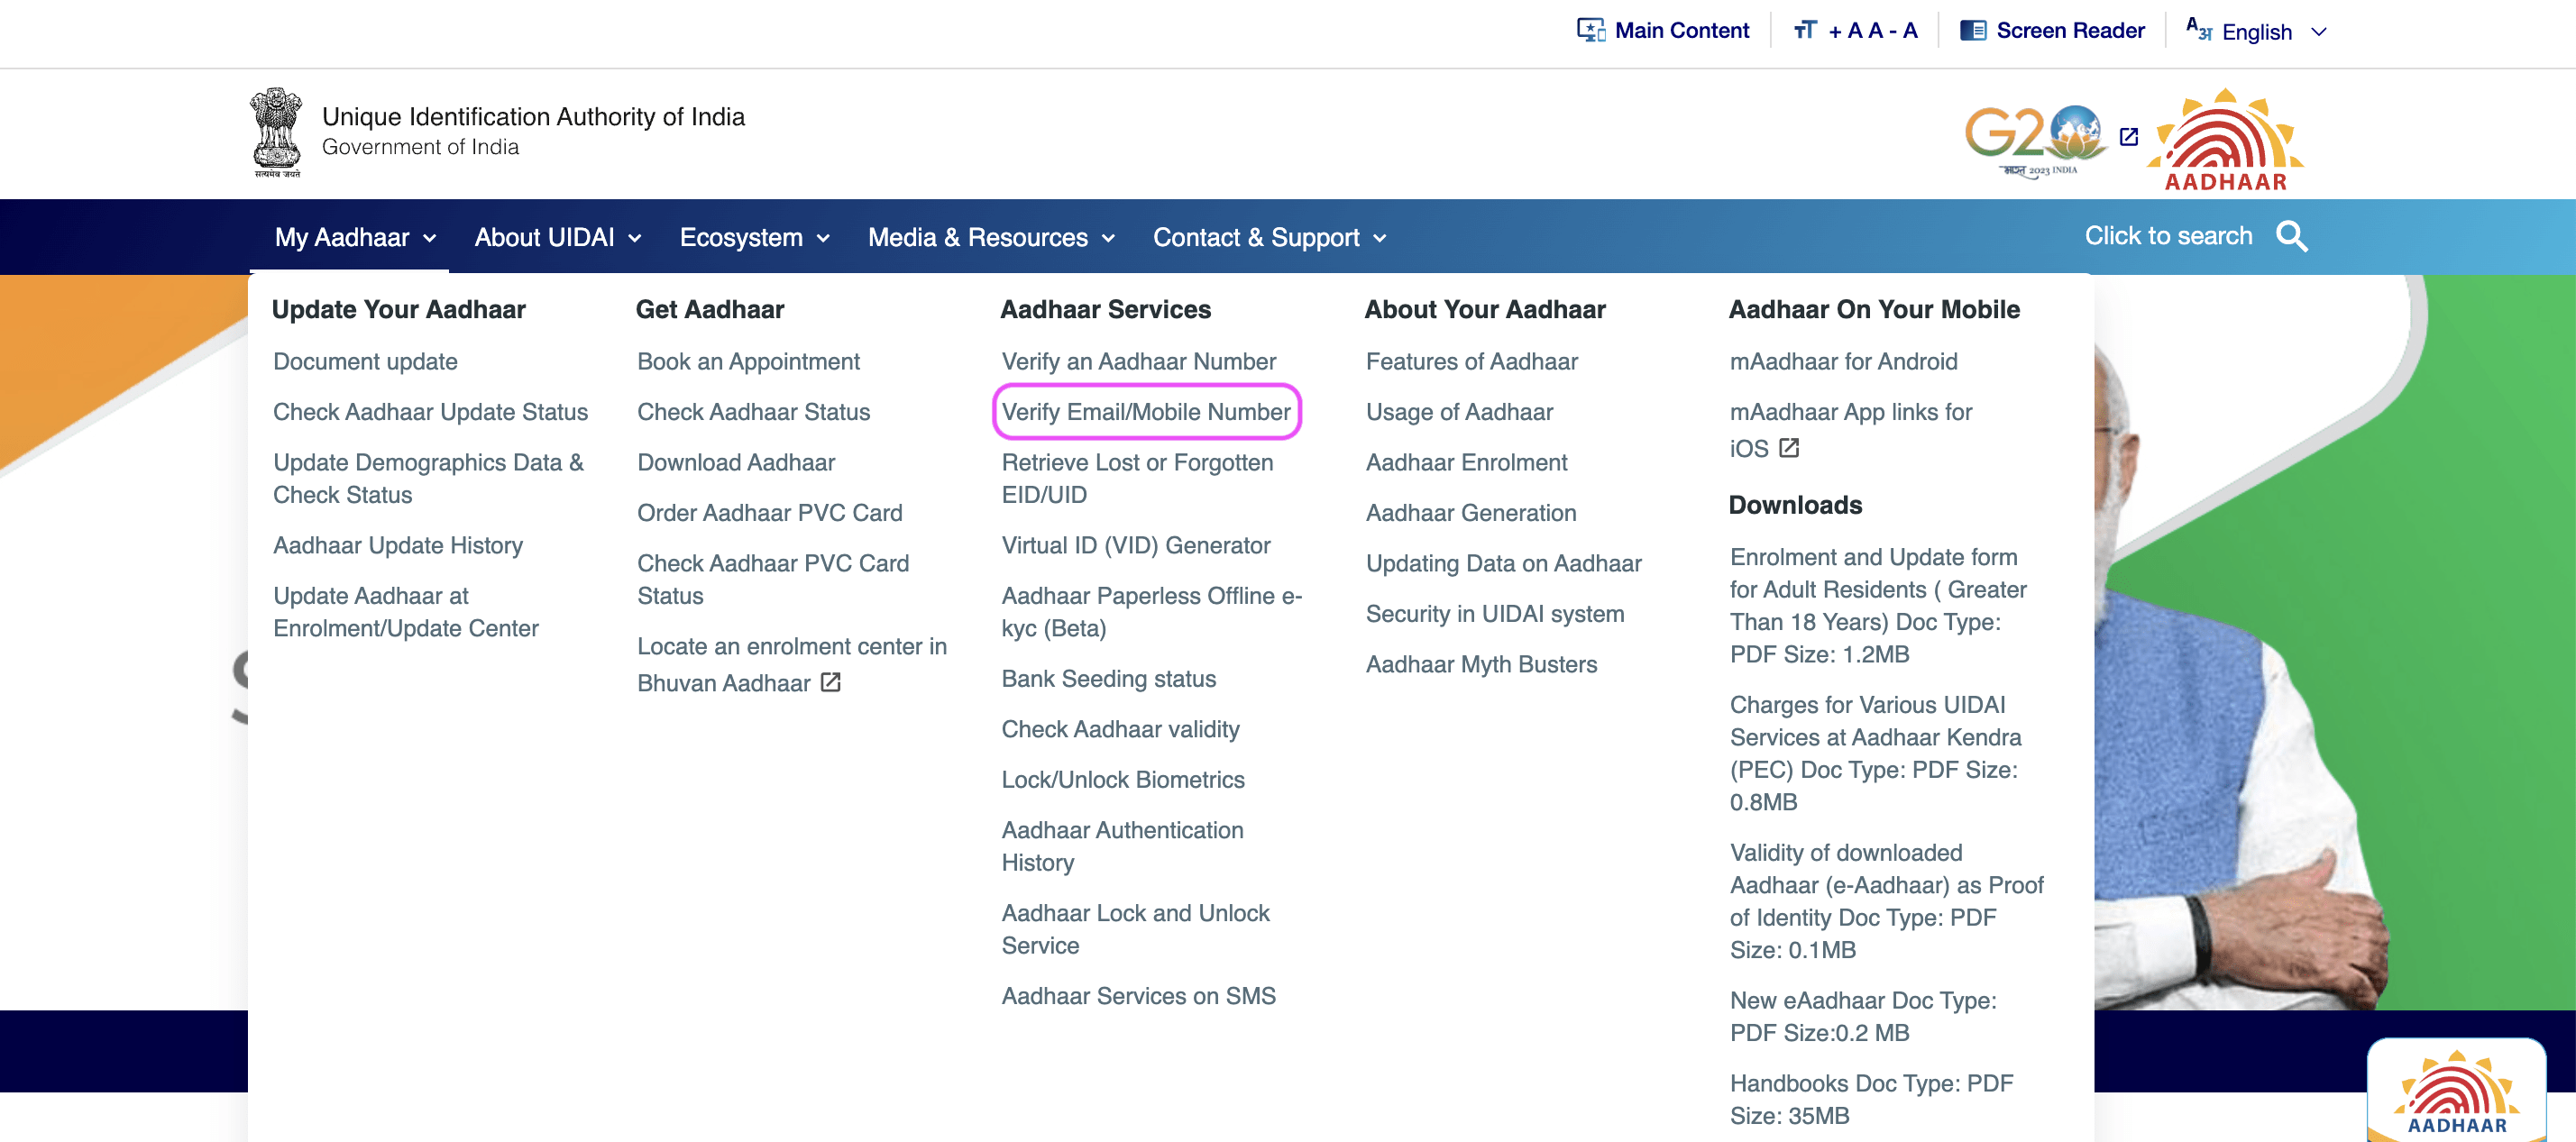
Step 3 - Click on "My Aadhaar"
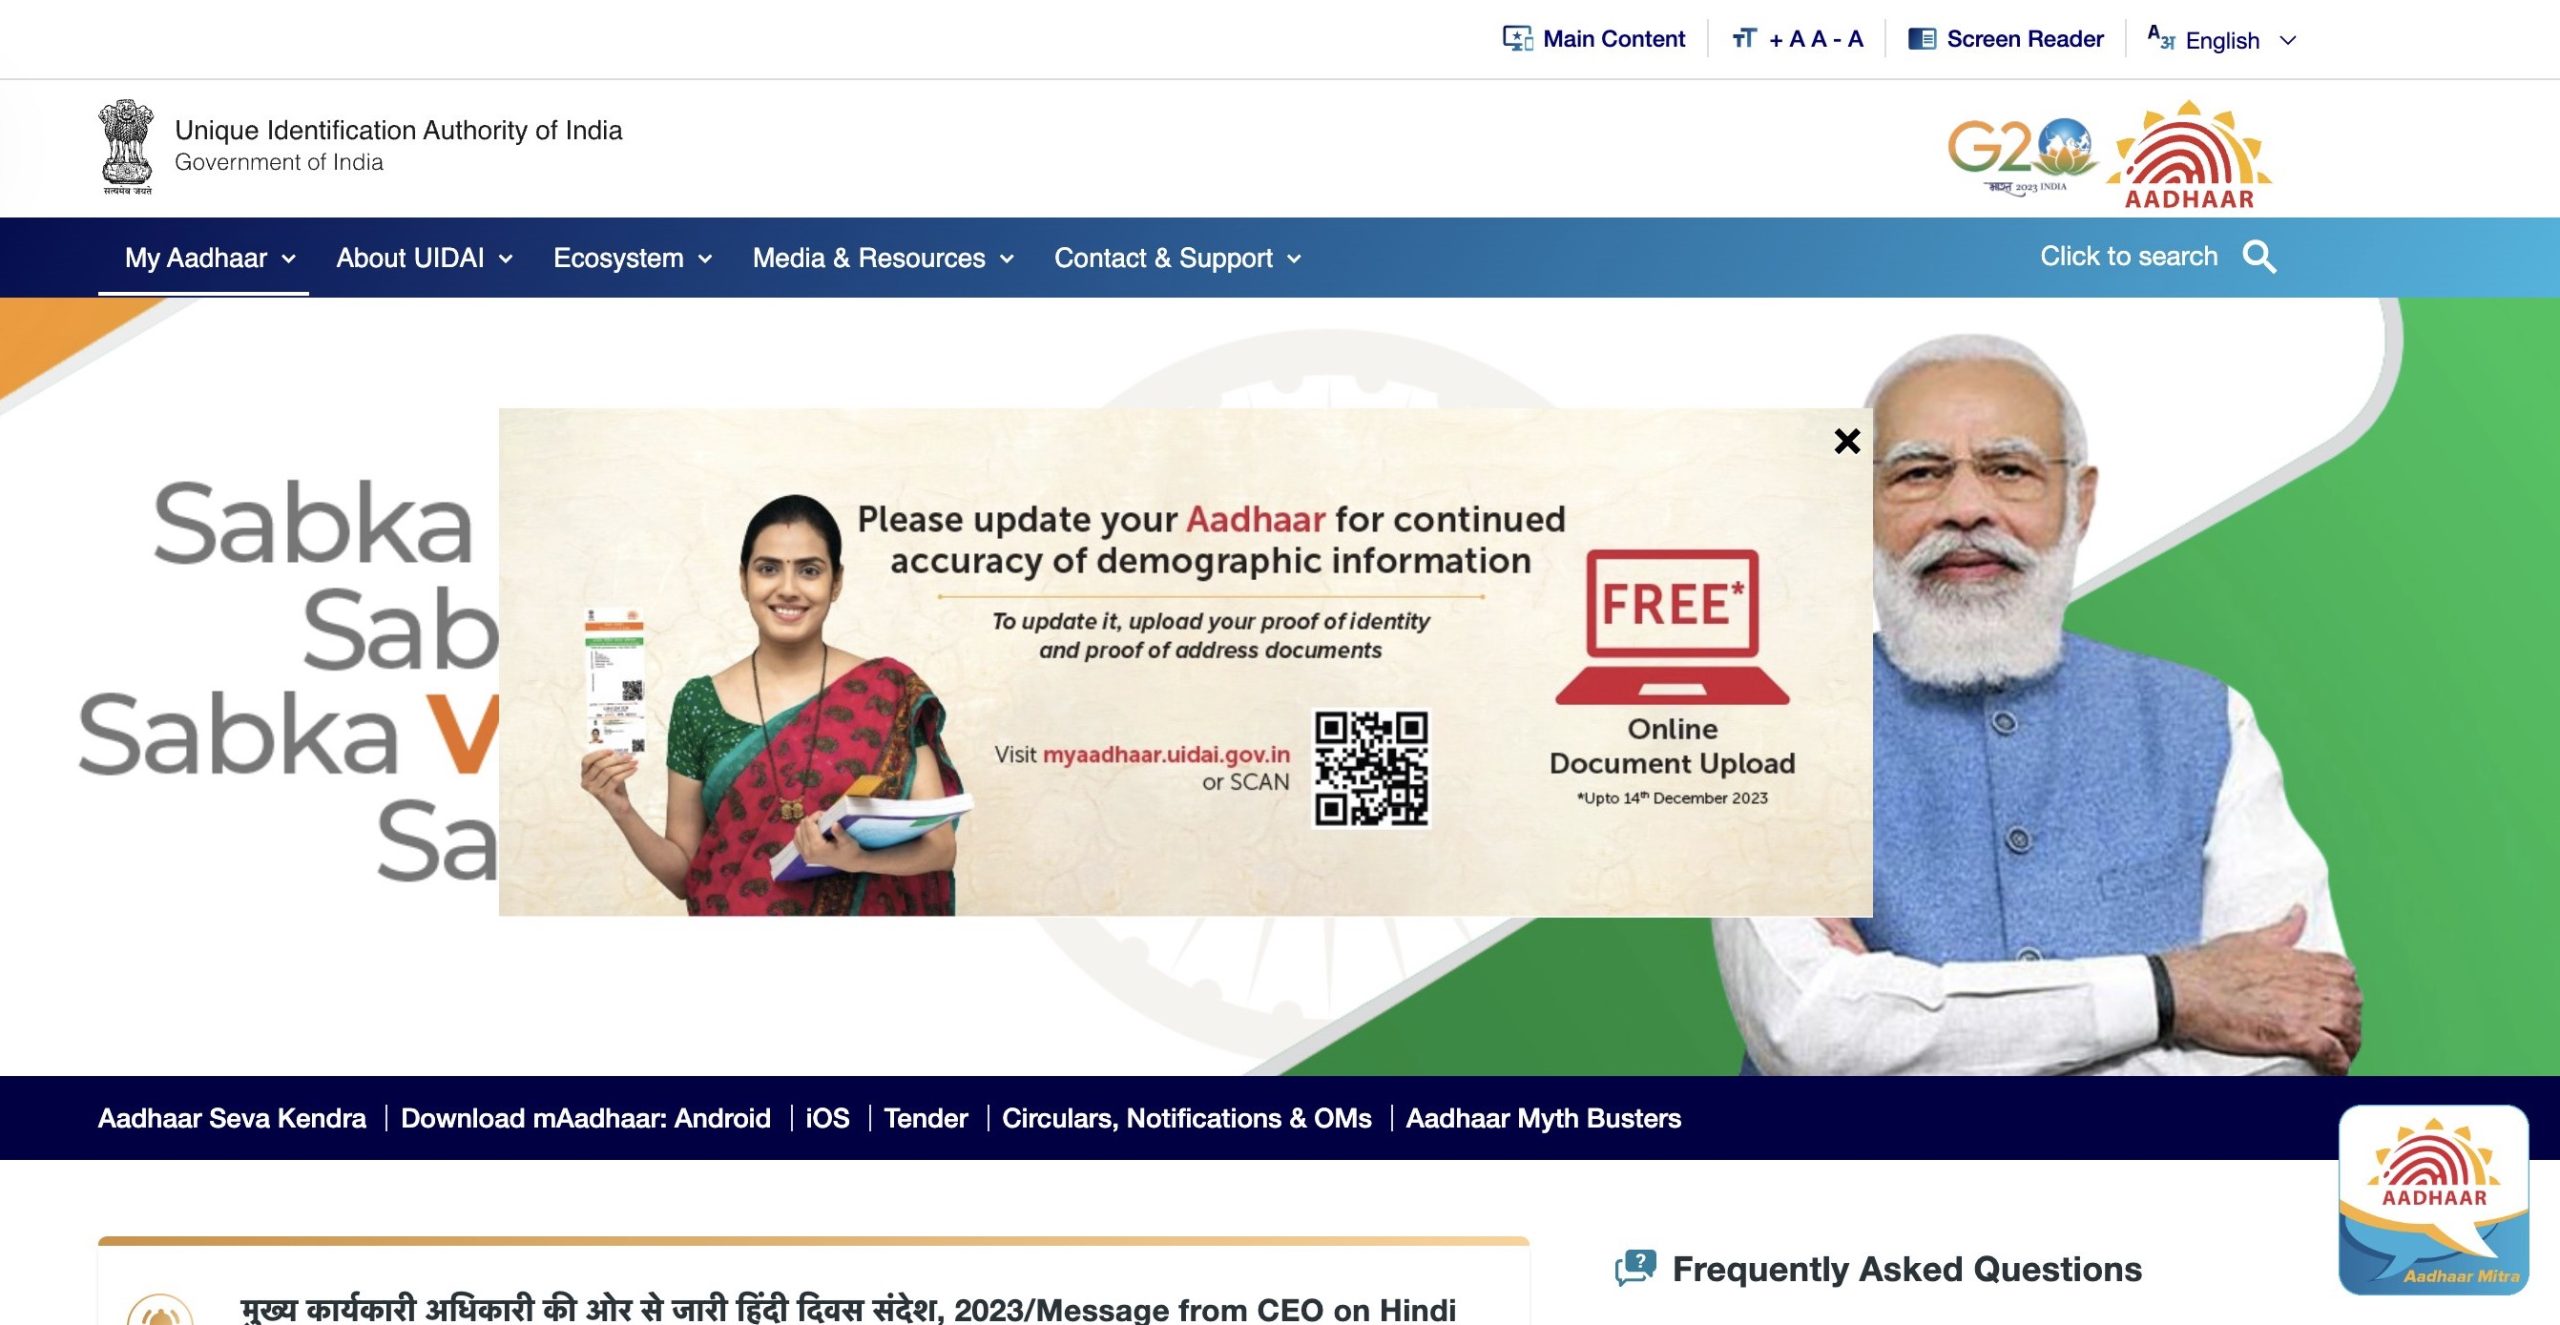
Important Note – If you can’t click on “My Aadhaar,” it’s due to a Pop-Up. Simply close the Pop-Up by clicking “×,” then access “My Aadhaar.”
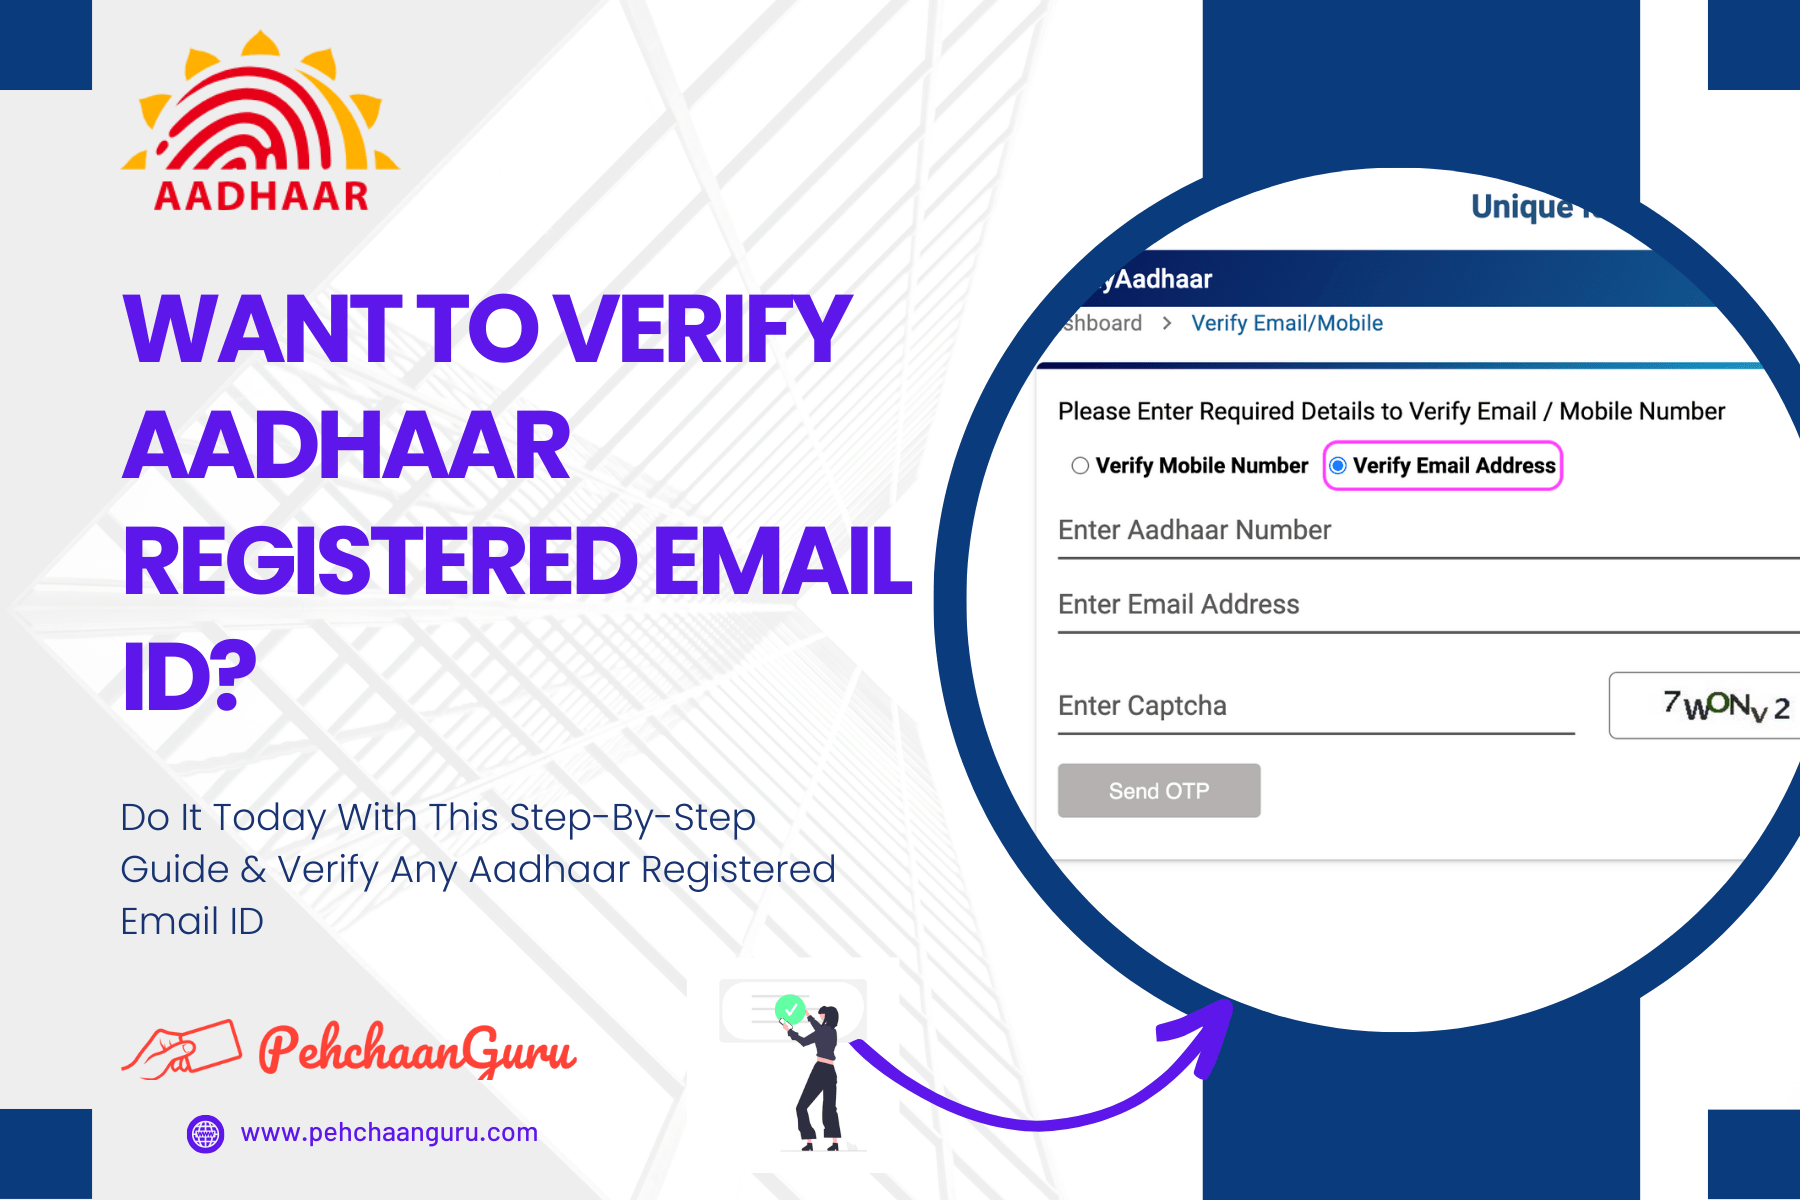
Step 4 - Choose and click on "Verify Email/Mobile Number" under "Aadhaar Services"
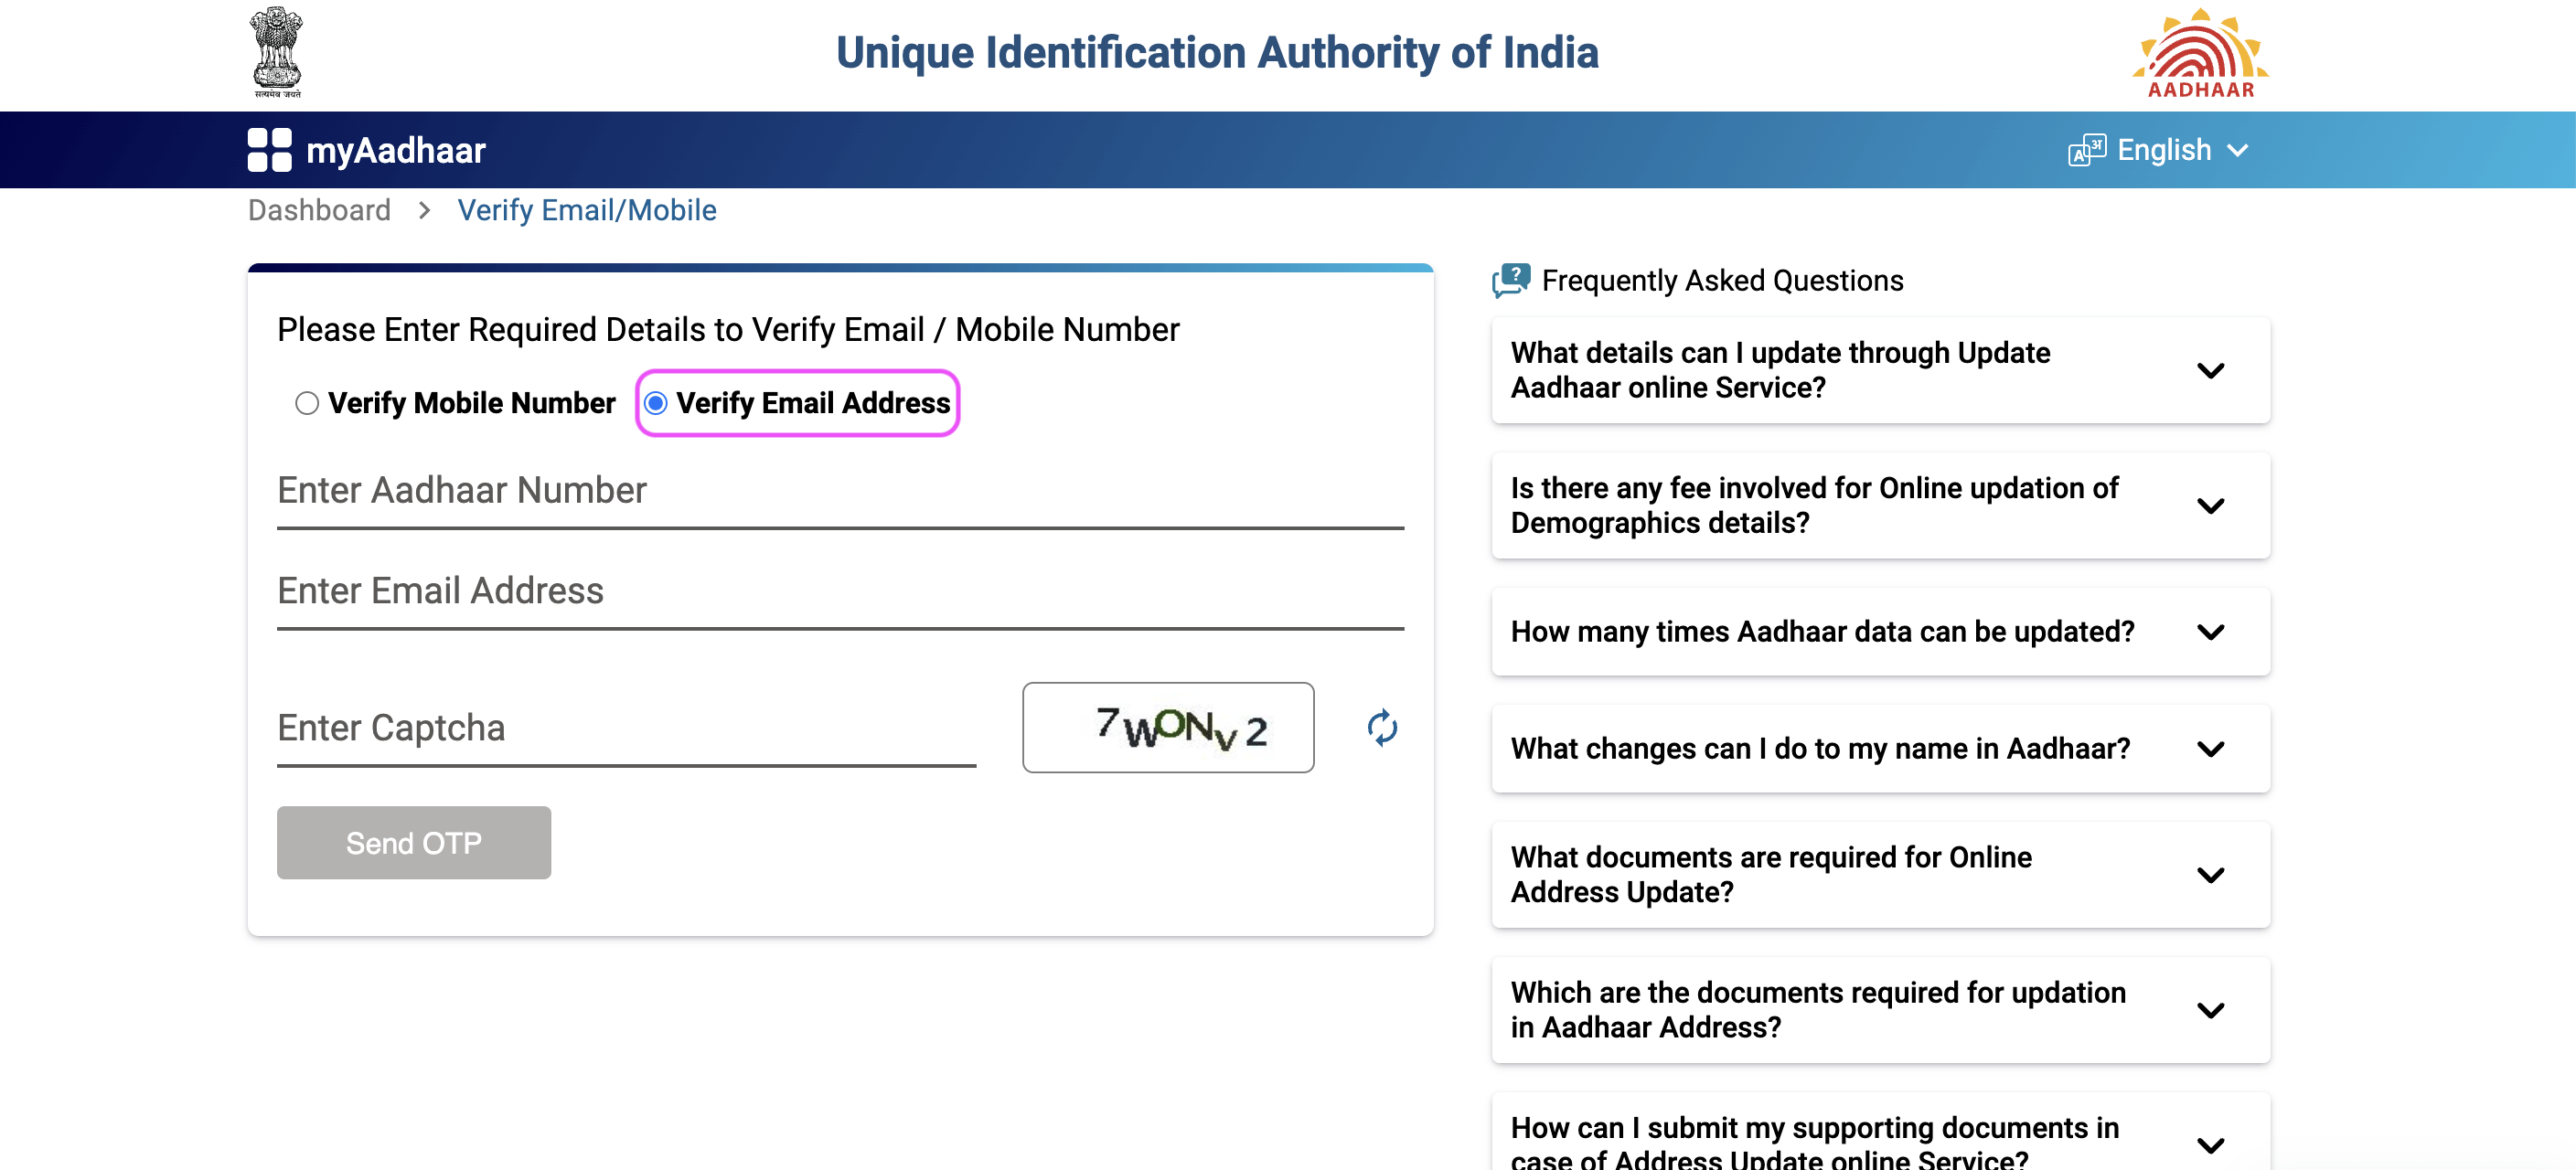
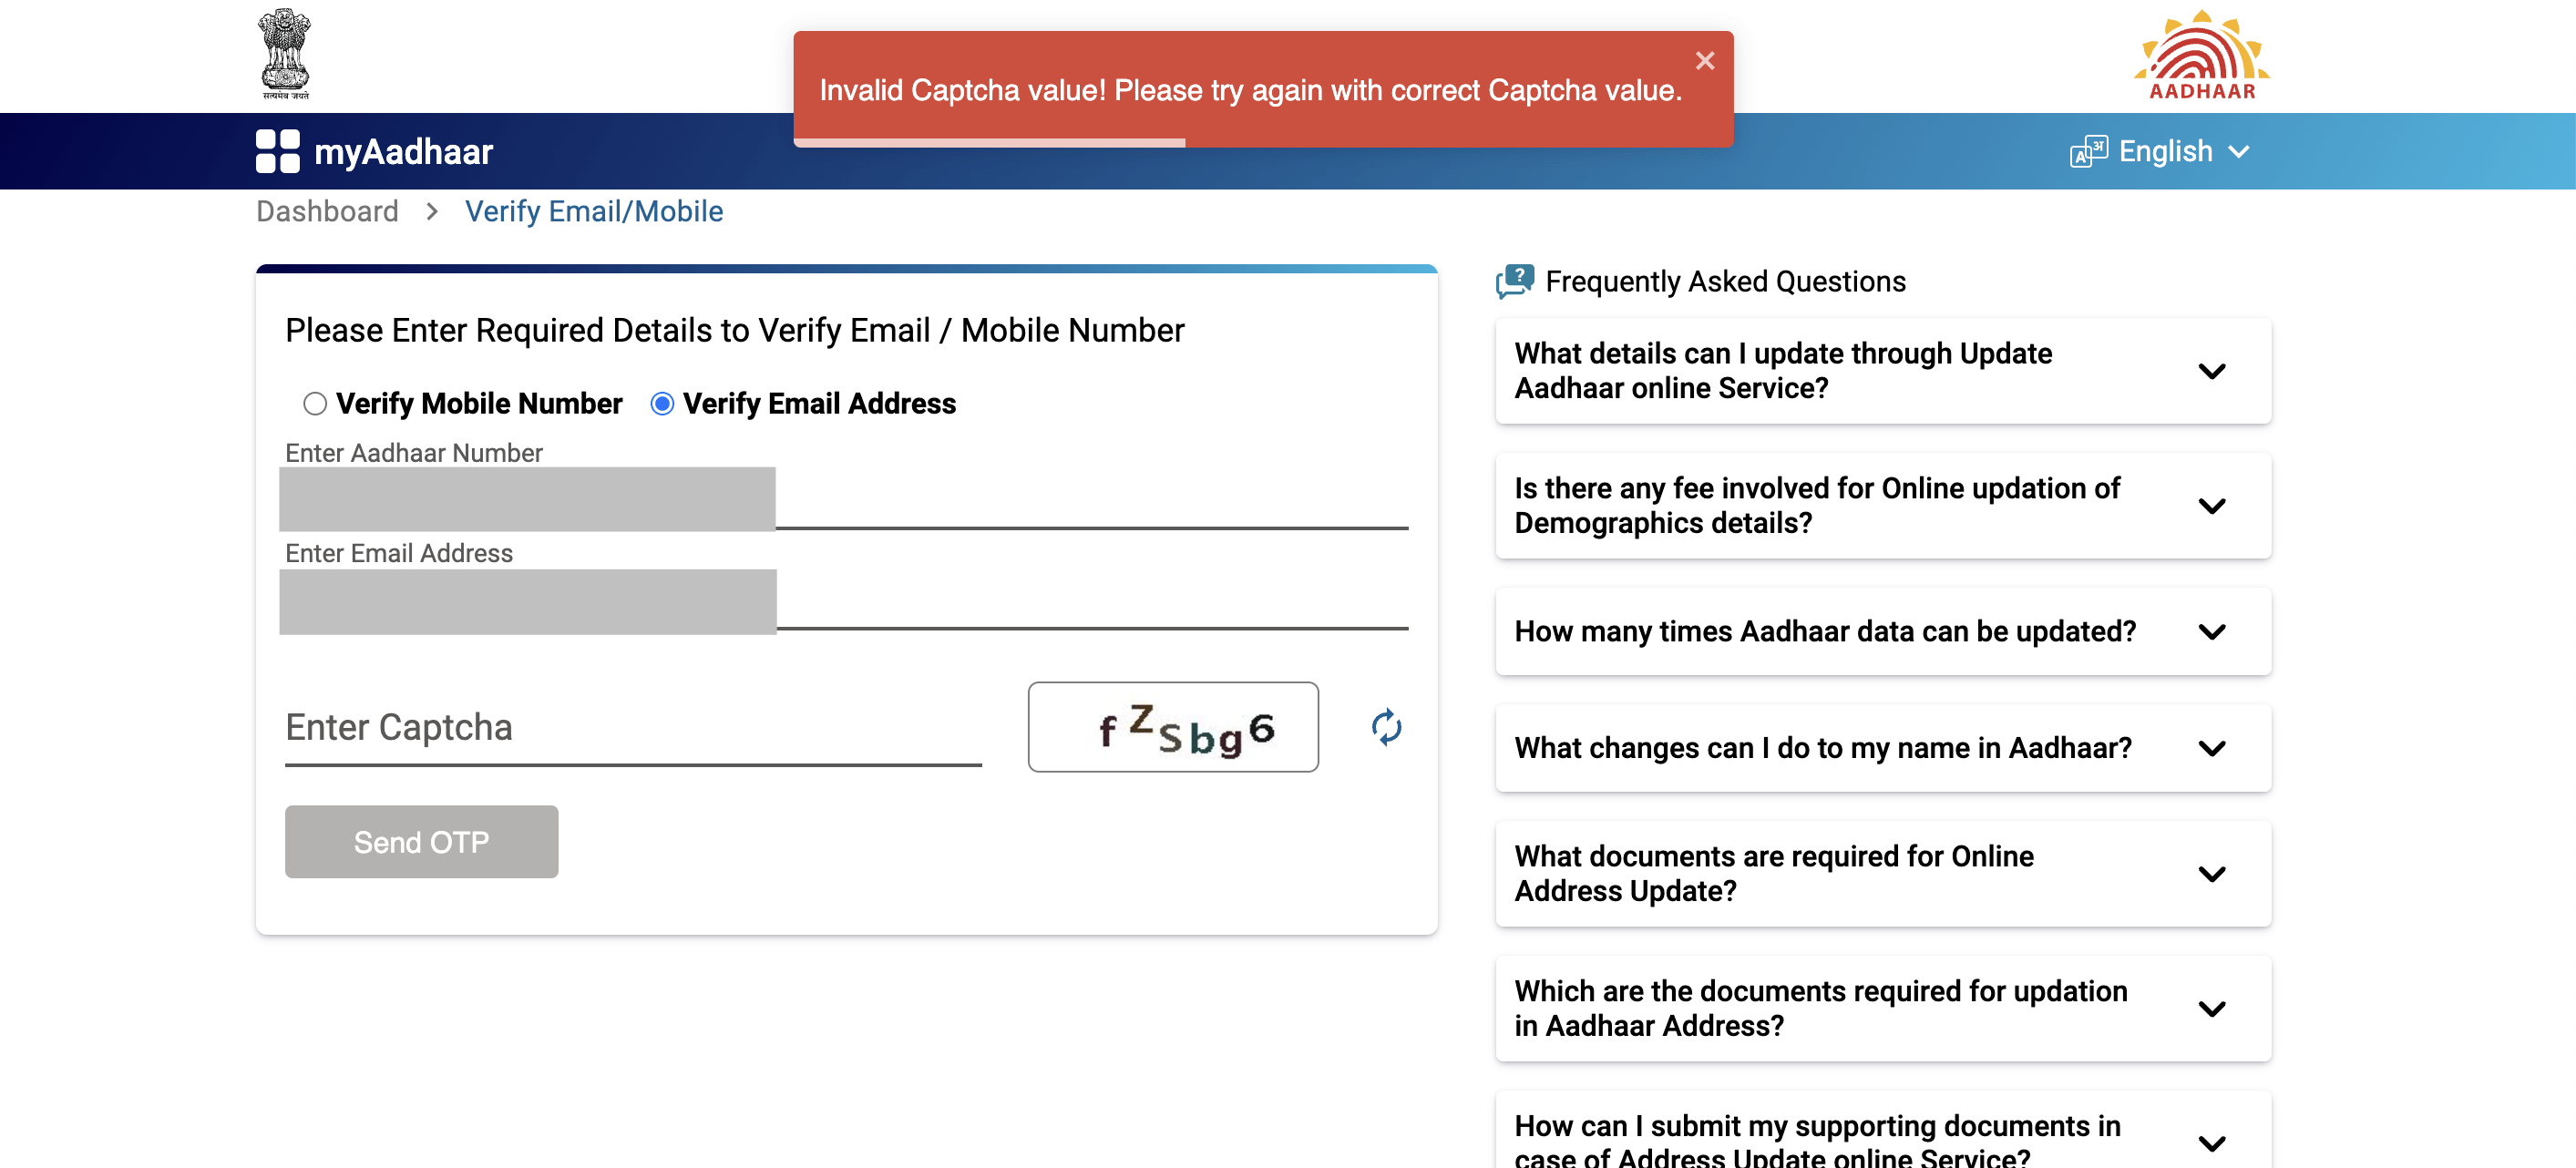
Step 5 – You will be redirected to Verify Email Mobile Page. Choose the "Verify Email Address" option
An Alternative: Visit the myAadhaar Portal by navigating to https://myaadhaar.uidai.gov.in/. Scroll down the page and locate the “Verify Email/Mobile” option, then click on it.
From the myAadhaar Portal, you can access the “Verify Email/Mobile” option, leading you to this webpage: https://myaadhaar.uidai.gov.in/verify-email-mobile
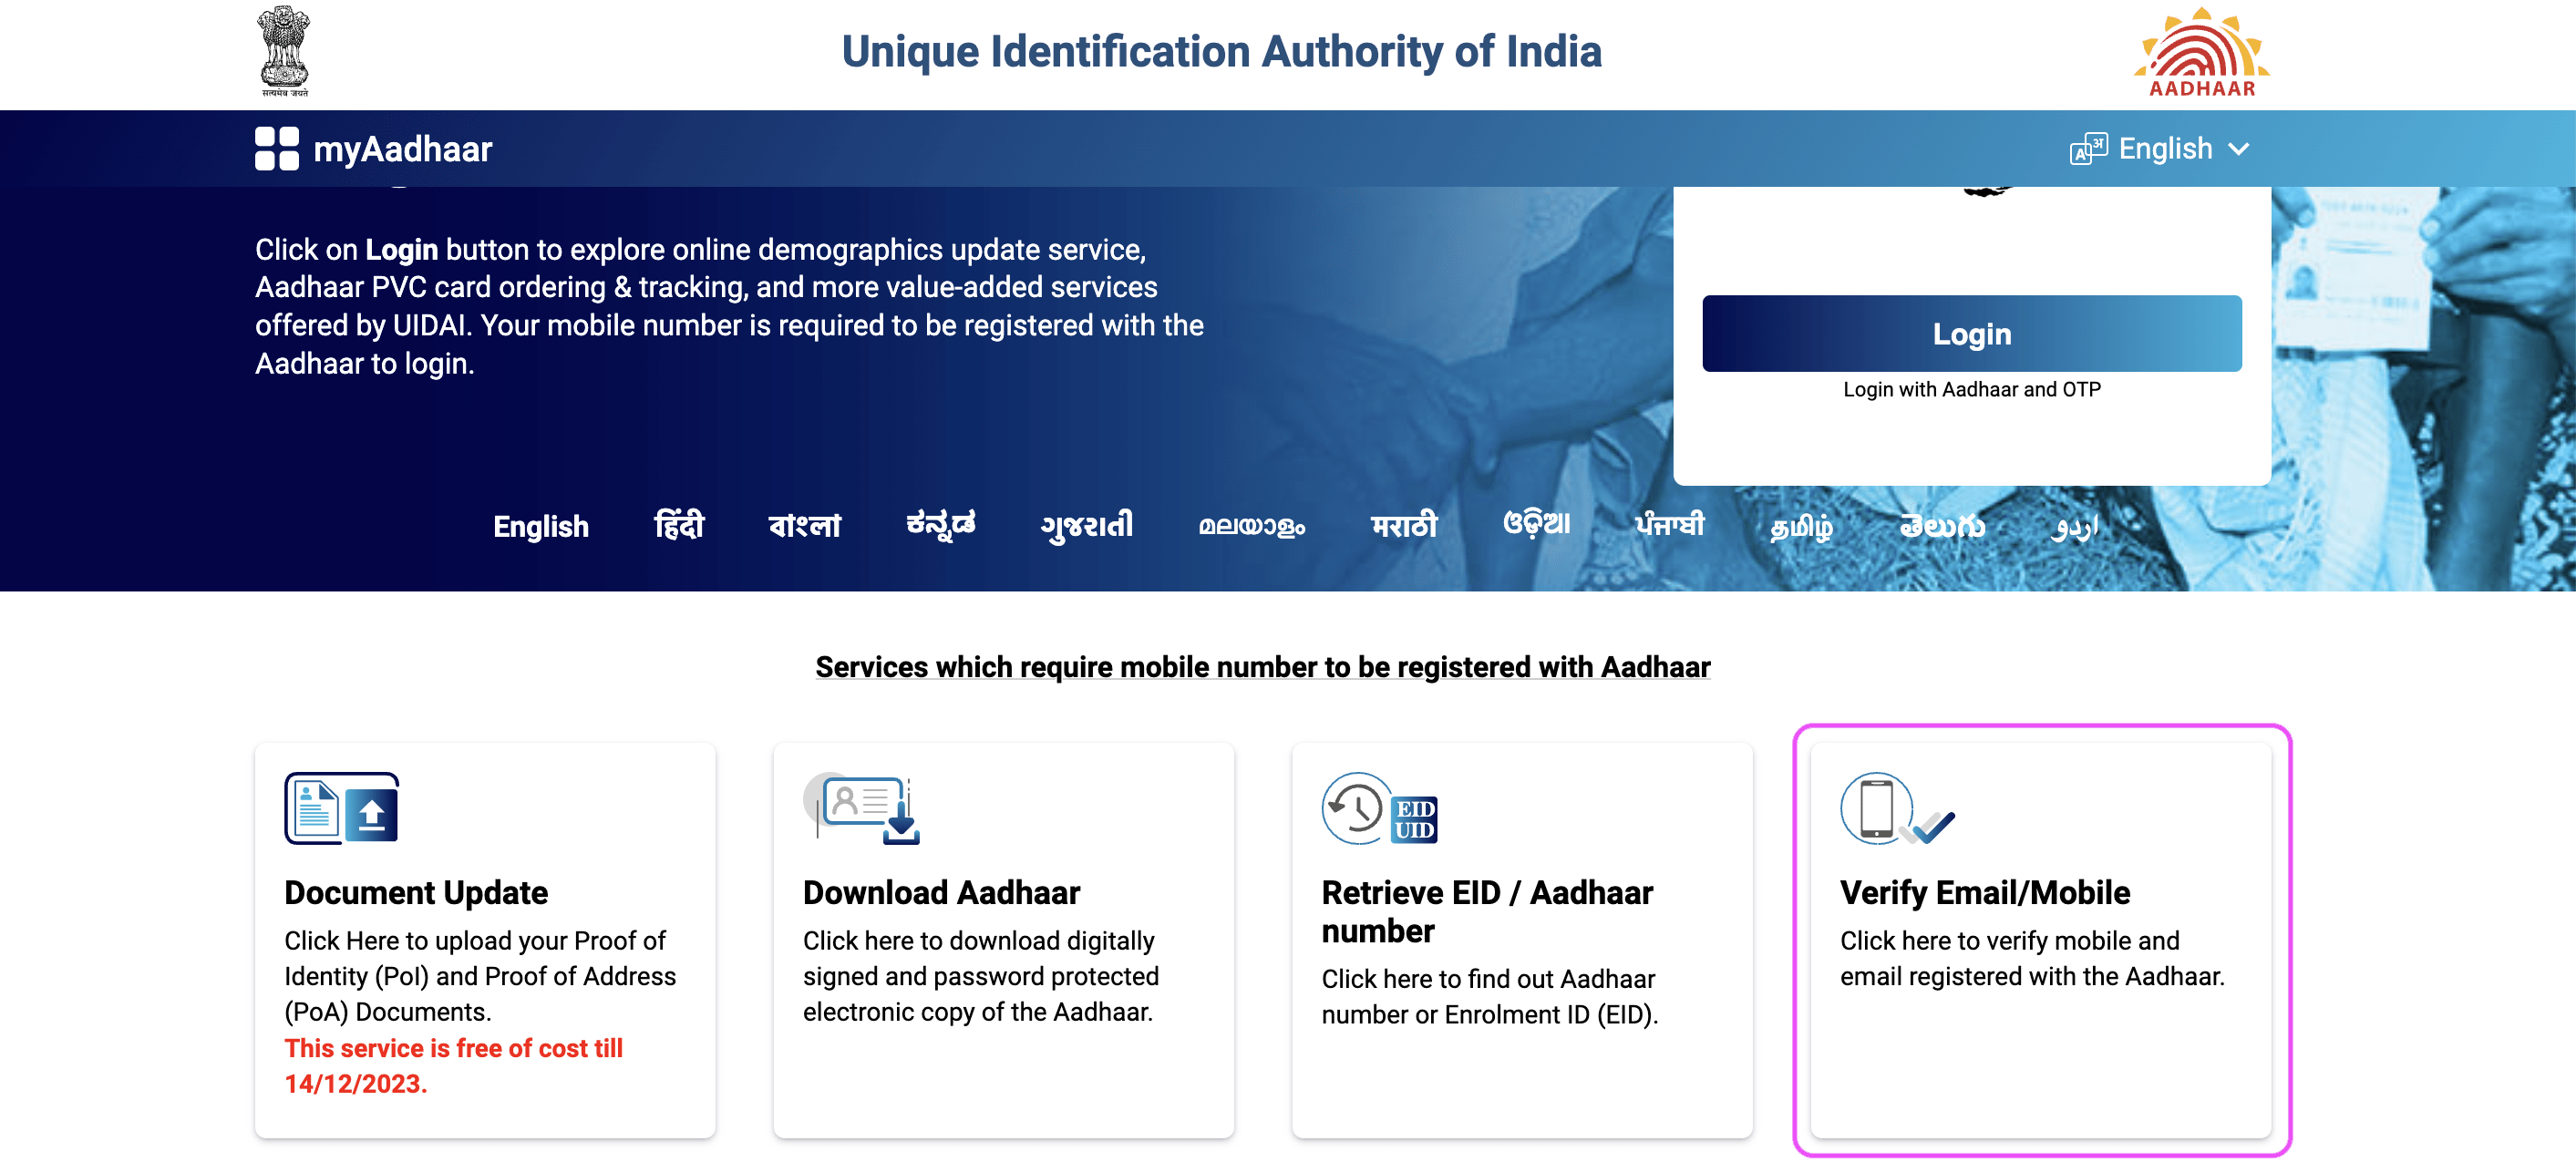
Vital Information – Alternatively, you can initiate your journey to verify the Aadhaar registered email ID directly through this webpage: https://myaadhaar.uidai.gov.in/verify-email-mobile
Step 6 - Enter the Aadhaar Number
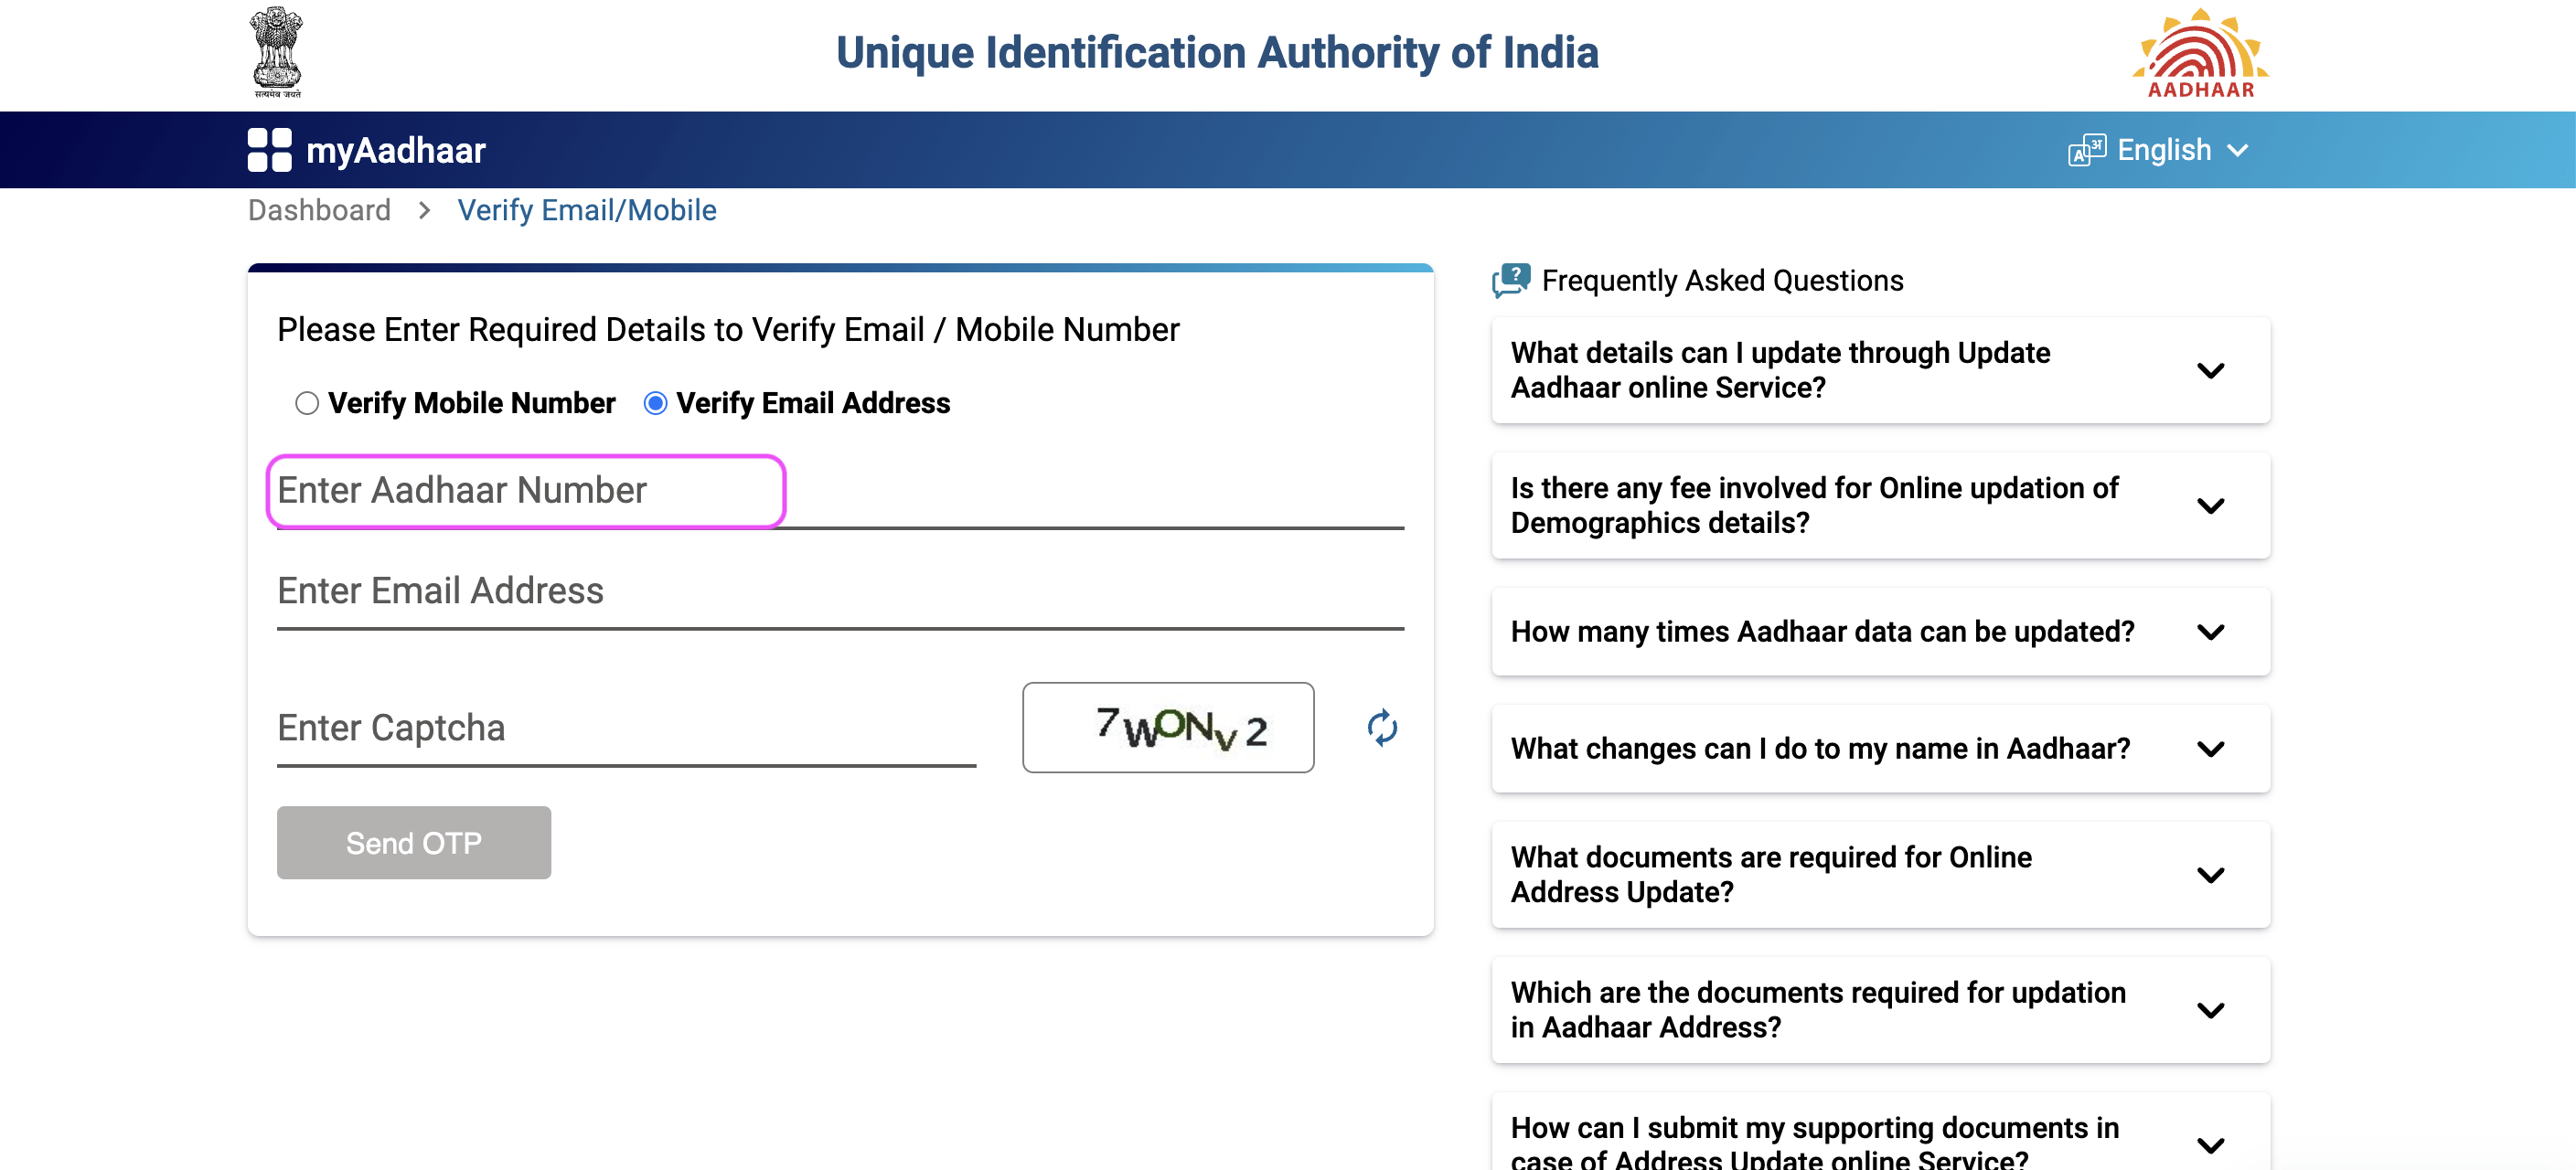
Step 7 - Enter the Email ID

Step 8 - Select the "Enter Captcha" field and input the characters and words displayed on your screen
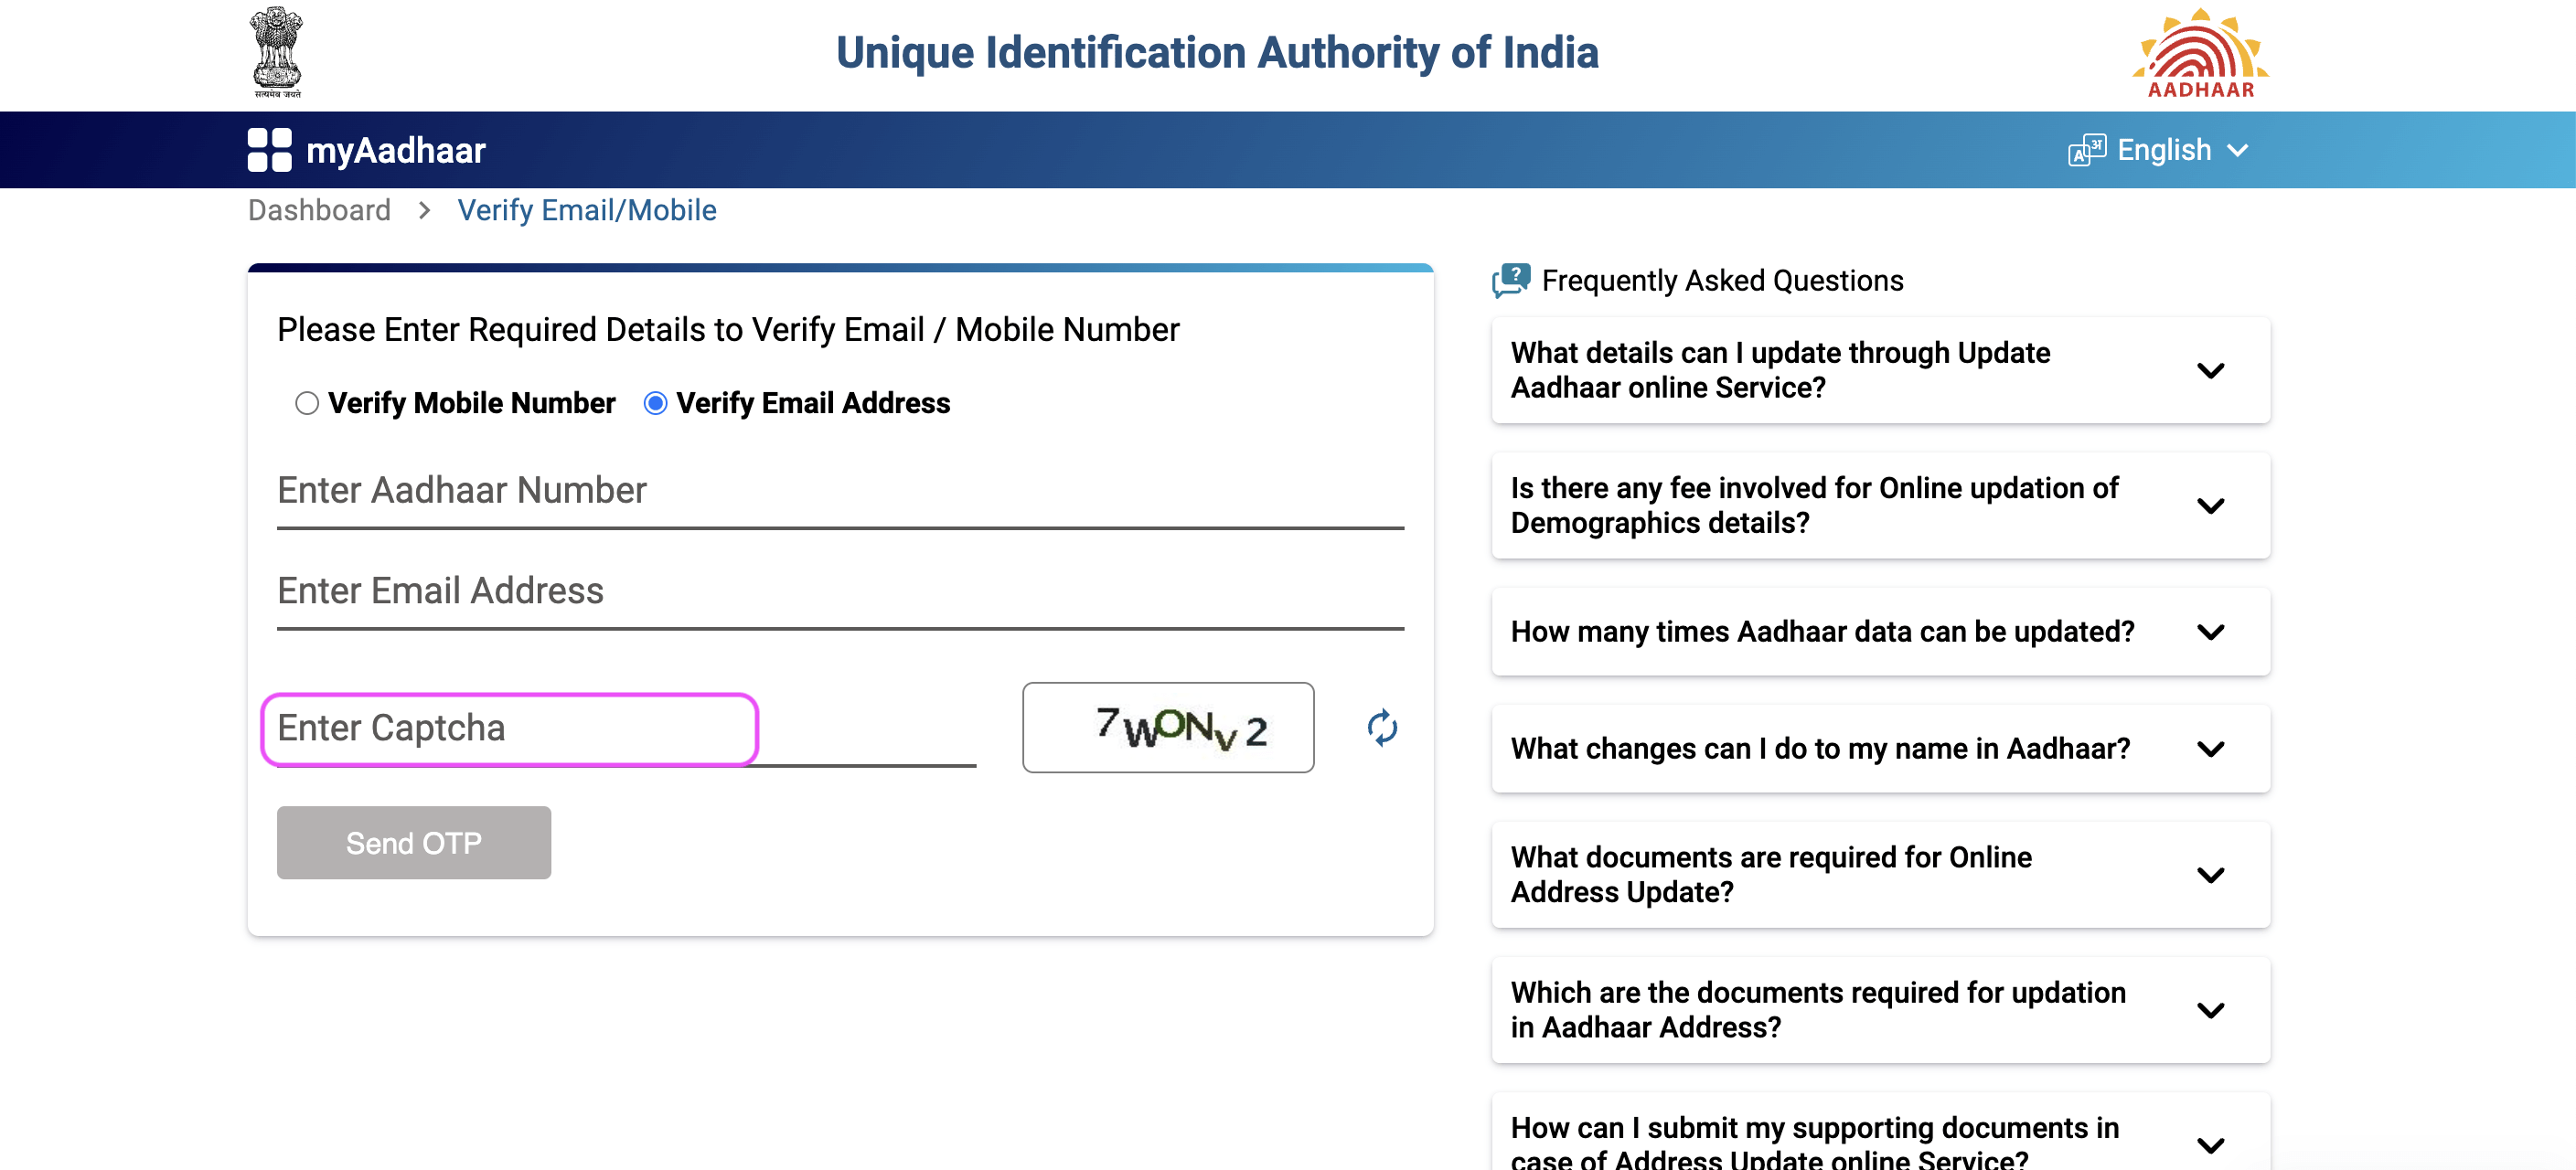
Important Note: If you face any challenges deciphering the “Captcha,” you also have the option to refresh and generate a new one.
Step 9 - Select the "Send OTP" button and click on it
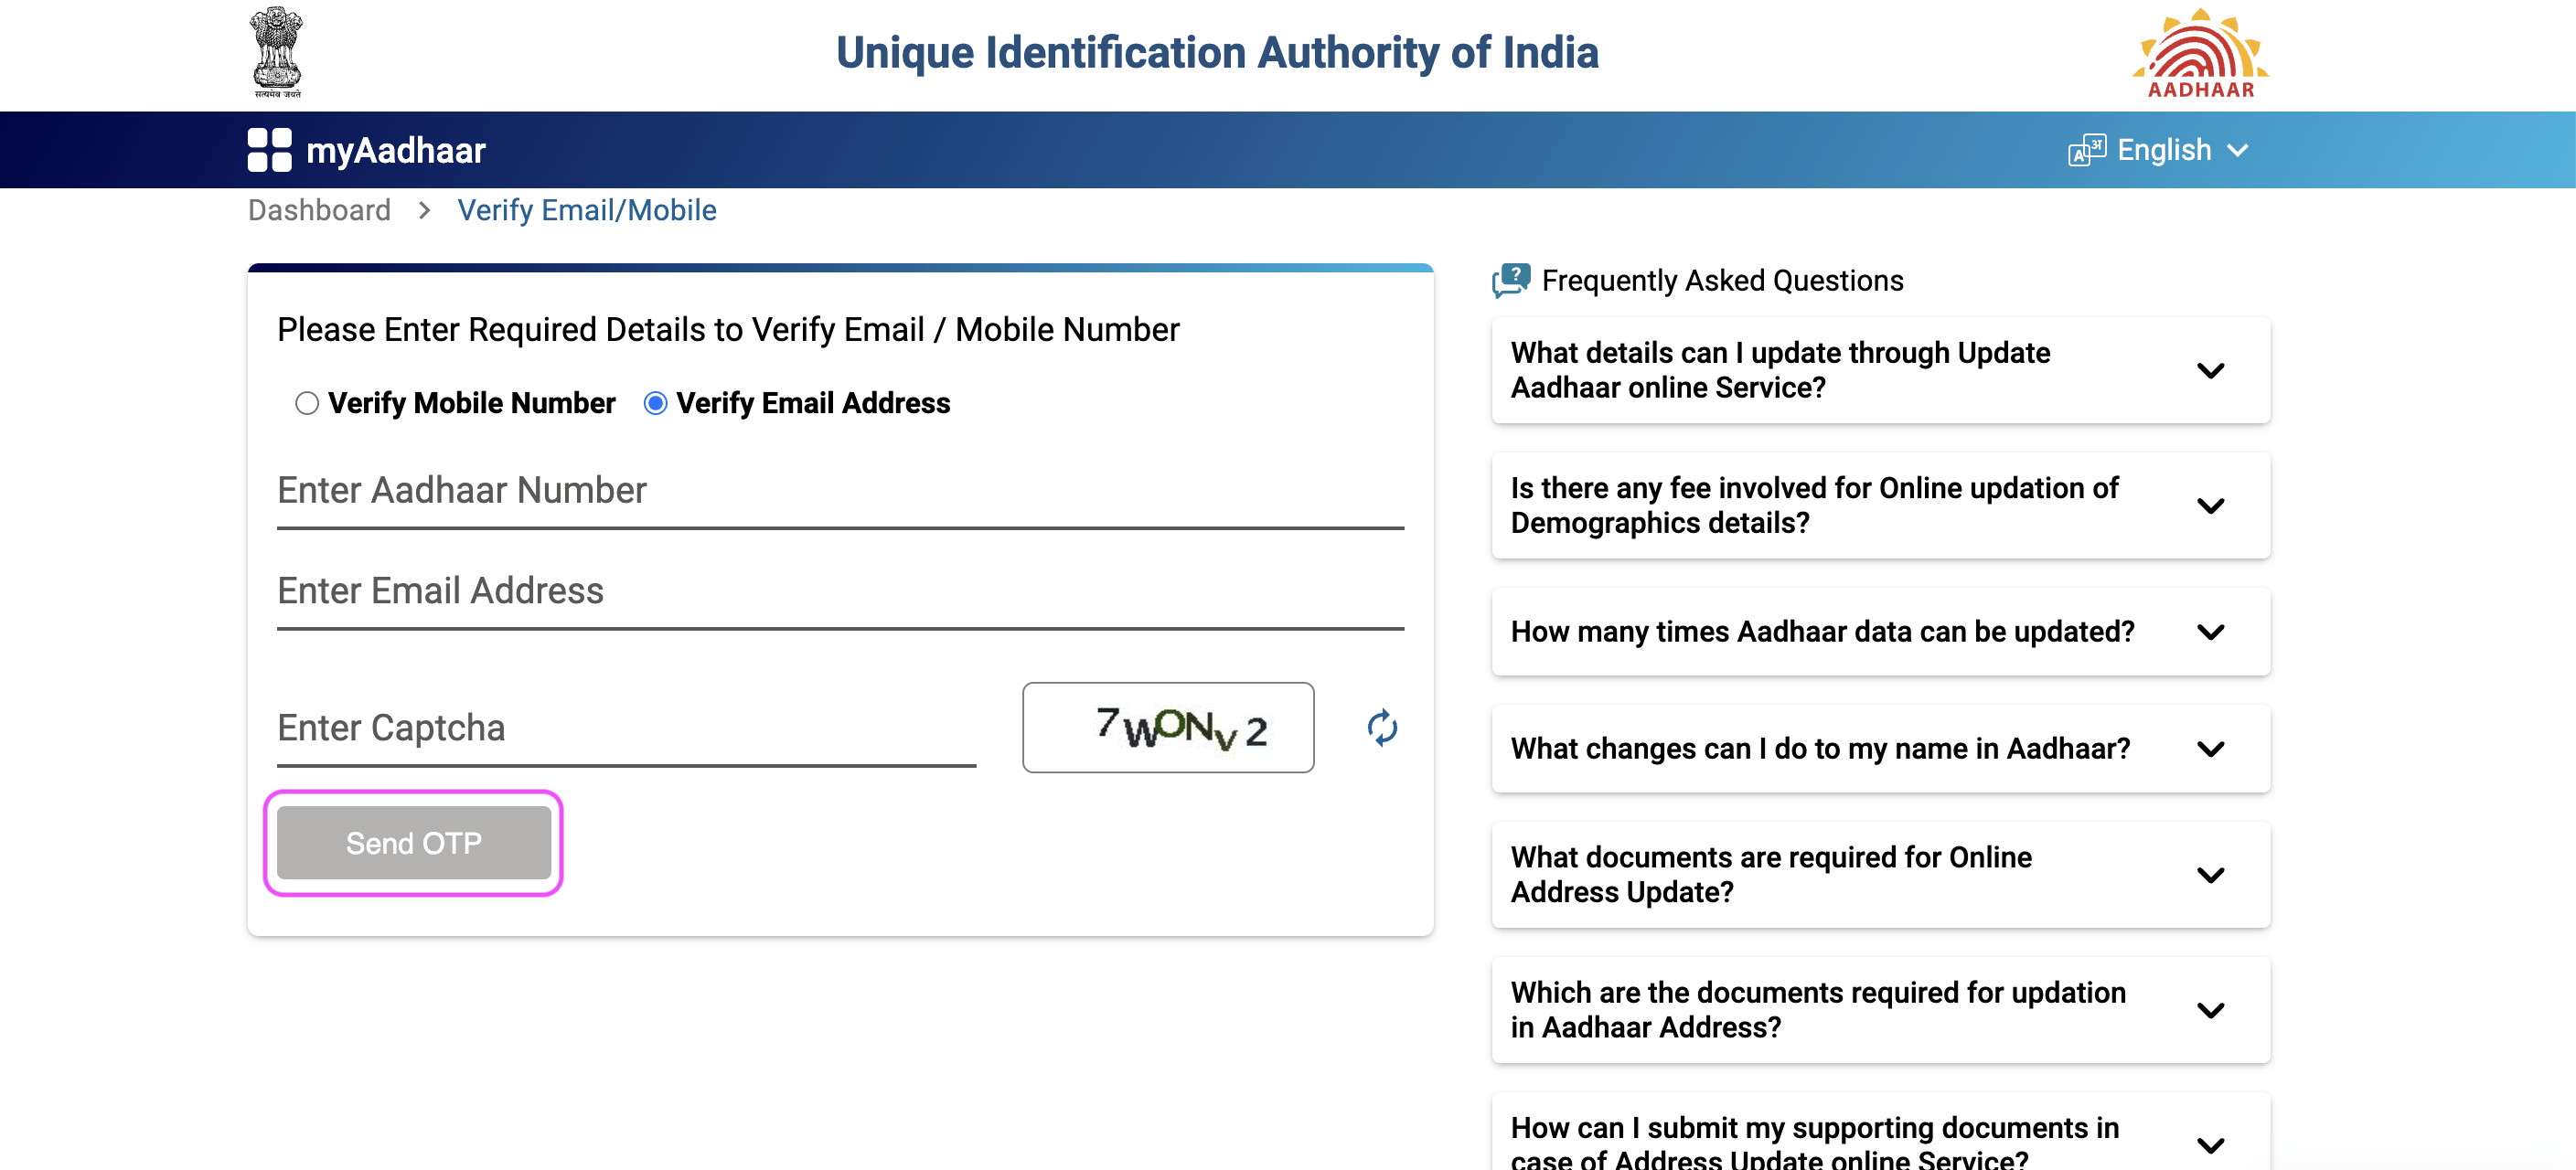
Important Note: After selecting the “Send OTP” button, an OTP won’t be sent to your entered email ID. Instead, a message will confirm their linkage in the UIDAI database.
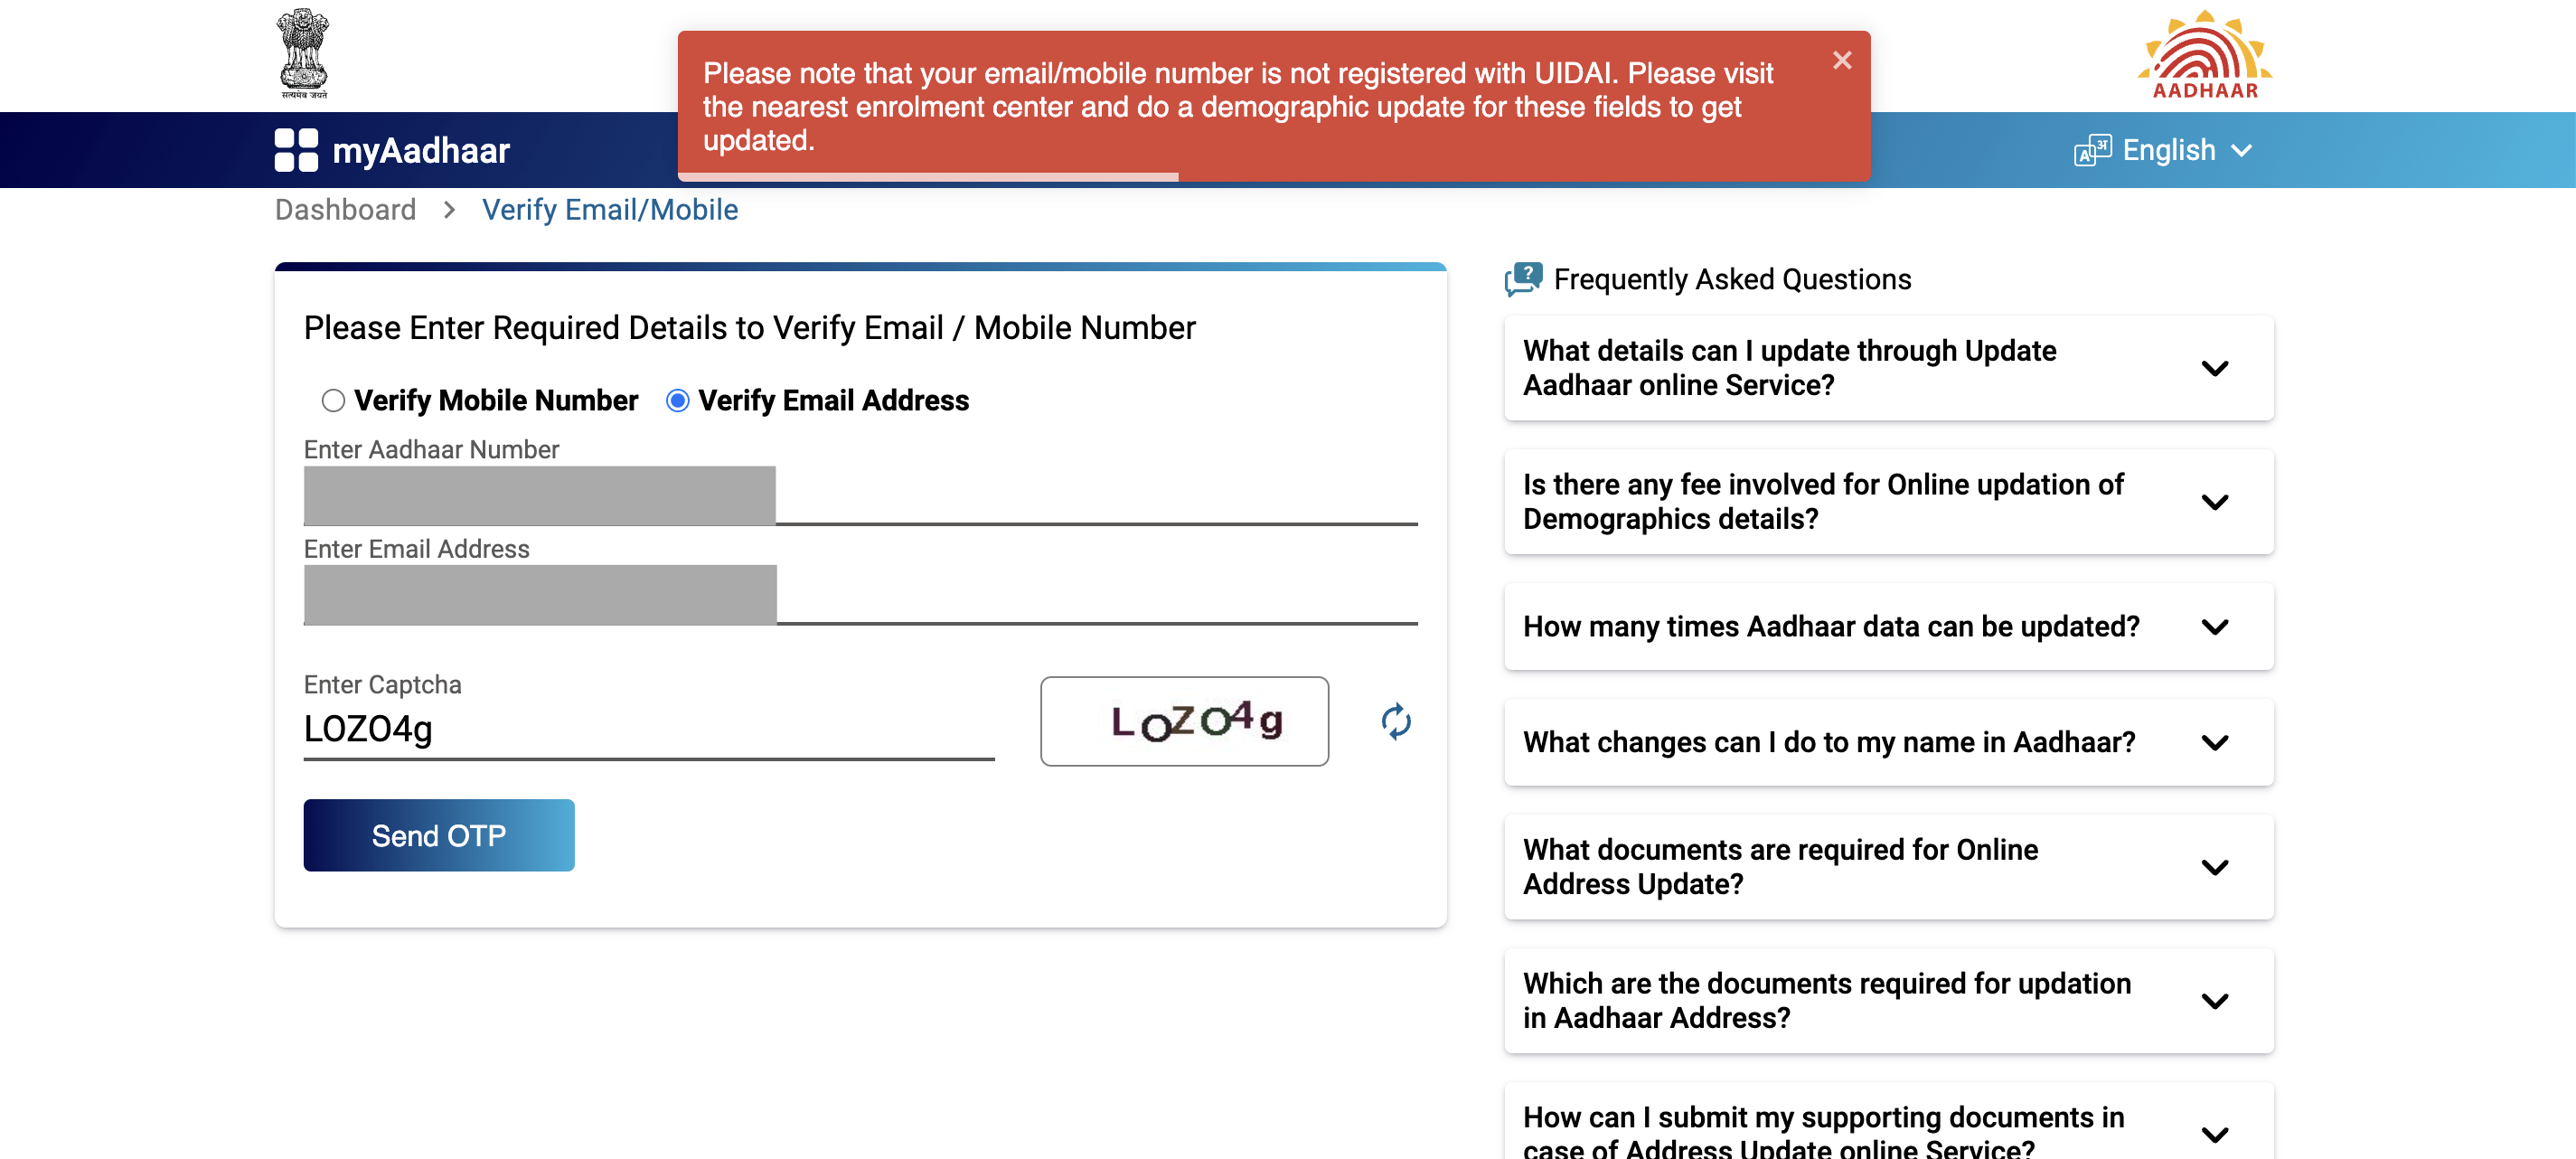
Step 10 - A message notification will appear on the screen confirming the linkage between the provided Aadhaar Number and the Email ID
If there is no email ID registered with the entered Aadhaar number, a different message will appear on the screen and it will state: “Please note that your email/mobile number is not registered with UIDAI. Please visit the nearest enrolment center and do a demographic update for these fields to get updated ”
When the email ID and the Aadhaar Number you’ve entered are connected, you’ll receive a message affirming: “The Email address you have entered is already verified with our records.”
If the email ID and the entered Aadhaar Number are not associated, a message will state: “The Email address you have entered does not match with our records.”
Entering an incorrect Captcha will trigger a message: “Invalid Captcha.” You can retry with a fresh one.
Conclusion
In summary, as we go about our daily lives in an increasingly digital world, knowing how to verify Aadhaar-registered email IDs is an essential skill for trust and security. Just like Priya did, you can ensure that important information is accurate for various aspects of your life.
Whether it’s for work, making new friends, or keeping your personal information safe, verification is a tool that gives you confidence and peace of mind in today’s interconnected world. So, follow these easy steps to verify your Aadhaar-registered email ID and enjoy the reassurance of knowing your online connections are reliable and secure.